How to Choose the Right Wedge Anchors for Your Project?

Choosing the right Wedge Anchors can decide whether a concrete connection remains secure or becomes a costly repair. On real job sites, anchor selection starts with the base material, not the product catalogue. Concrete strength, cracked conditions, embedment depth, edge distance, and fixture thickness all influence performance. The load matters too. Tension, shear, vibration, and repeated loading can change the answer.

Ronald A. Cook, a recognized researcher in concrete anchorage, has stated, “The behavior of an anchor is a system response, not an isolated material response.” That principle deserves attention. A strong anchor may still fail when installers overlook spacing, hole cleaning, or tightening torque. Small details matter.

Begin with the project drawings and applicable design requirements. Then compare anchor diameter, length, steel grade, corrosion resistance, and approval status. Outdoor, coastal, or chemically exposed locations may require stainless steel or a suitable coated option. For heavy equipment, calculate the design loads carefully. Guesswork is not enough.

Installation quality remains critical. Drill a clean, properly sized hole. Remove dust and debris. Set the anchor to the specified depth. Apply the manufacturer’s torque, using a calibrated wrench when possible. Even experienced crews can rush this step. That is worth admitting.

This guide explains how to evaluate Wedge Anchors with practical judgment. It also highlights common mistakes, because a perfect-looking specification can still fail in imperfect concrete. Select the anchor for the entire connection, not just its advertised holding strength.

How to Choose the Right Wedge Anchors for Your Project?

Understand Wedge Anchor Types and Their Structural Roles

How to Choose the Right Wedge Anchors for Your Project?

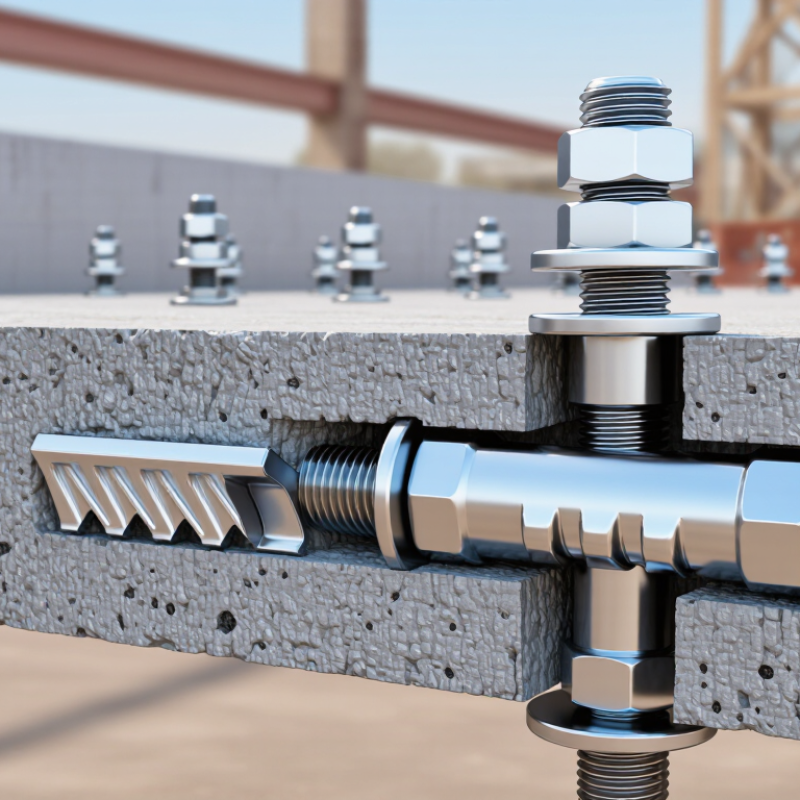
Wedge anchors secure fixtures by expanding inside drilled concrete holes. Their structural role is simple but critical: they transfer tension and shear into the concrete. Torque-controlled anchors expand when the nut reaches the specified torque. This creates consistent clamping force. Some anchors suit cracked concrete, while others are intended for uncracked concrete only. That difference matters.

Start with the load, not the anchor box. A canopy bracket may create tension and shear at the same time. A handrail usually experiences repeated movement and changing direction. Select the anchor diameter, embedment depth, and steel grade for those demands. Check edge distance and spacing carefully. Concrete can split when anchors sit too close to an edge. Embedment that looks deep enough may still be inadequate after drilling dust remains.

Installation quality controls the anchor’s real performance. Use the specified drill diameter and clean the hole thoroughly. Tighten with a calibrated torque wrench, rather than guessing by feel. Corrosive or damp locations may require suitable protective finishes or stainless steel. The strongest anchor is not always the safest choice. A larger diameter can increase concrete stress. Design tables and project drawings should guide selection, with qualified engineering review for critical connections. In practice, small errors often come from rushed layout or poor hole cleaning. That deserves honest attention.

Match Anchor Materials to the Project Environment

How to Choose the Right Wedge Anchors for Your Project?

Choosing wedge anchors starts with the project environment, not just the load rating. In dry indoor spaces, zinc-plated carbon steel may suit light or moderate attachments. However, condensation, dust, and cleaning chemicals can change that decision.

Outdoor concrete needs stronger corrosion protection. Hot-dip galvanized steel usually performs better with regular rain and humidity. Near saltwater, stainless steel is often the safer choice. Chlorides are persistent. They can attack exposed metal and stain nearby concrete.

Material is only one part of a reliable anchor selection. Check the concrete strength, embedment depth, edge distance, and expected tension or shear loads. Keep dissimilar metals apart when possible, because contact can accelerate corrosion. Follow the tested installation procedure and use calibrated tools.

I once focused too heavily on anchor capacity and overlooked drainage around the connection. That small detail mattered. A clean specification can still miss real site conditions. Review the environment throughout the anchor’s service life, not only on installation day.

Tips

Inspect the concrete before drilling. Avoid cracked or weakened areas unless the design permits them. Choose stainless steel for severe coastal exposure, but confirm its strength meets the project demand. For uncertain conditions, ask a qualified engineer to review corrosion data, load calculations, and local requirements. Photos of rust, standing water, or peeling coatings can help explain site risks clearly.

Determine Load Requirements and Select the Correct Anchor Size

How to Choose the Right Wedge Anchors for Your Project?

Determine Load Requirements and Select the Correct Anchor Size

Anchor selection starts with the actual load, not the anchor diameter. Calculate tension, shear, and combined loading for each connection. ASCE 7-22 load combinations, such as 1.2D + 1.6L, help define design actions for many building conditions. Project-specific wind, seismic, impact, and vibration demands may require additional combinations. A neat calculation can still be wrong.

ACI 318-19 Chapter 17 requires checks for concrete breakout, pullout, pryout, and steel strength. It also distinguishes cracked from uncracked concrete. Record the concrete strength, slab thickness, edge distance, and anchor spacing before selecting a size. A larger anchor is not automatically safer. Insufficient edge distance can reduce capacity sharply, even when embedment looks adequate.

Use the manufacturer’s tested values only when installation conditions match the published criteria. ICC-ES AC193 covers qualification requirements for mechanical anchors, while ASTM E488/E488M provides tension and shear test methods. Compare the factored demand with the published design strength, including the applicable reduction factors. Then verify the required embedment with a calibrated torque wrench. I have seen installations fail because the hole was dusty or too shallow. Recheck drilling depth, hole diameter, washer placement, and torque on site. Small oversights matter.

Check Base Material, Embedment Depth, and Installation Conditions

How to Choose the Right Wedge Anchors for Your Project?

Start by identifying the base material, because anchor performance depends on it. Wedge anchors are commonly selected for sound, cured concrete. Check whether the concrete is cracked, lightweight, damaged, or close to an edge. These conditions can change the required anchor type and capacity. Masonry may require a different fastening method. Do not rely on appearance alone. Review project drawings, tested load data, and applicable installation requirements before choosing a diameter.

Embedment depth matters as much as anchor diameter. The anchor must reach the specified effective depth, not merely fit inside the hole. Drill deeper than the required embedment so dust and debris do not block full seating. Hole diameter, drill bit condition, and cleaning method also affect performance. A dusty hole can reduce expansion and create a false sense of security. I have seen installers focus on torque while overlooking poor hole cleaning. That mistake deserves attention.

Tips: Mark the required depth on the drill bit. Keep the anchor perpendicular to the surface. Use a calibrated torque wrench, and follow the stated torque value. Maintain required edge distances and spacing. Check temperature, moisture, and corrosion exposure before installation. If the base material is uncertain, pause and obtain an engineer’s assessment. Guessing is not a reliable installation method.

Verify Compatibility, Safety Standards, and Long-Term Performance

Choosing wedge anchors starts with the base material, not the box label. Concrete strength, thickness, cracks, and edge distance control the safe choice. On site, I measure the slab and inspect for reinforcement before drilling. A 1/2-inch anchor may look suitable, yet insufficient embedment can reduce holding power. Measure twice. Match the anchor diameter, length, and required embedment to the fixture and calculated tension and shear loads.

Compatibility also includes the installation environment. Interior dry concrete differs from a wet parking deck or coastal exposure. Select a corrosion-resistant finish suitable for that exposure, and confirm material compatibility with the fixture. Check technical data for approved base materials, spacing, edge distances, torque, and hole diameter. Do not rely on appearance. A torque wrench matters. Follow project specifications and applicable safety standards, while keeping inspection records, batch information, and test reports.

Long-term performance depends on installation quality as much as anchor design. Drill with the specified bit, clear dust, set the anchor fully, and apply the stated torque. A dusty hole can undermine a sound calculation. I once treated a clean-looking hole as acceptable and learned that visual checks alone are weak evidence. Proof testing may suit critical connections, especially when concrete quality is uncertain. Recheck exposed anchors during maintenance for looseness, rust, cracking, or water intrusion. Some projects need more review than expected. That is not wasted time. It is risk control.

How to Choose the Right Wedge Anchors for Your Project? - Verify Compatibility, Safety Standards, and Long-Term Performance
Selection Dimension Typical Data or Requirement What to Verify Before Purchase Why It Matters Selection Guidance
1. Base Material Compatibility
Normal-weight concrete Concrete with a compressive strength commonly specified at 20–35 MPa or higher. Confirm the anchor’s published allowable loads for the actual concrete strength and condition. Anchor capacity depends strongly on concrete strength, thickness, cracking, and reinforcement layout. Generally suitable
Lightweight concrete Lower-density concrete can provide less anchorage capacity than normal-weight concrete. Use only an anchor with tested or evaluated values for the specific lightweight concrete type. Concrete breakout and pullout resistance may be reduced. Use verified data
Concrete masonry units Hollow or partially grouted masonry is not equivalent to solid concrete. Check whether the anchor is approved for the exact masonry configuration; use a suitable sleeve or other anchor type when required. A standard wedge anchor may not expand or develop reliable resistance in hollow cells. Application-specific
Brick, block, stone, or asphalt These substrates may have variable strength, voids, joints, or weak layers. Do not assume concrete-anchor performance applies. Unverified substrates can cause premature pullout, splitting, or cracking. Do not use without approval
2. Size, Embedment, and Layout
Common nominal diameters 1/4 in, 3/8 in, 1/2 in, 5/8 in, 3/4 in, and 1 in are commonly available sizes. Match the diameter to the design load, fixture hole, washer size, and approved product data. Larger diameter does not automatically provide higher capacity if concrete thickness, edge distance, or spacing is inadequate. Select by design load
Drill-hole diameter For many conventional wedge anchors, the required carbide drill-bit diameter is the same as the nominal anchor diameter. Follow the specific installation instructions; some systems may differ. An oversized, undersized, or damaged hole can prevent proper expansion and torque development. Follow product instructions
Effective embedment Common designs use approximately 4d to 10d embedment, where d is the anchor diameter; the actual value is product- and load-dependent. Verify the minimum and maximum embedment listed in the evaluation report or technical data. Embedment affects tension, shear, pullout, and concrete-breakout resistance. Use approved design values
Concrete thickness Base-material thickness must exceed the required embedment plus the manufacturer’s minimum back clearance. Confirm slab or wall thickness and check for reinforcement, conduits, and tendons before drilling. Insufficient thickness can cause breakout, spalling, or damage to embedded services. Measure before drilling
Spacing and edge distance Required values vary by anchor size, embedment, concrete condition, load direction, and design method. Use the published minimum spacing and edge-distance limits; do not substitute a generic rule. Closely spaced anchors or anchors near an edge can significantly reduce capacity. Check the design table
3. Load and Structural Performance
Tension load Resistance may be governed by steel failure, concrete breakout, pullout, or combined failure modes. Compare factored design tension with the applicable design resistance for the actual installation. Visible anchor size alone cannot predict safe tension capacity. Use engineering values
Shear load Resistance may be limited by steel shear, concrete edge breakout, pryout, or fixture behavior. Check edge distance, load direction, hole clearance, and any required washer or fixture thickness. Shear performance is often controlled by the concrete edge rather than the anchor steel. Evaluate edge effects
Combined tension and shear Simultaneous loads require interaction checks rather than separate tension and shear checks only. Use the applicable design standard or evaluation report interaction equation. Combined loading can reduce the allowable resistance of both failure modes. Require design verification
Static versus dynamic loading Ordinary wedge anchors are commonly selected for static or quasi-static loads. For vibration, fatigue, impact, seismic, or sustained tension, confirm specific qualification and design data. Repeated or fluctuating loads can cause loosening, fatigue, or progressive damage. Special approval may be needed
4. Material and Environmental Resistance
Zinc-plated carbon steel Typically intended for dry, interior, low-corrosion environments. Confirm that the coating and exposure classification are suitable for the location. Plating alone may not provide adequate long-term protection in wet, outdoor, or chemical environments. Interior use preferred
Mechanically galvanized steel Provides a thicker zinc coating than standard zinc plating in many product ranges. Verify coating thickness, service environment, and compatibility with treated materials. Improved corrosion resistance can extend service life, but performance remains environment-dependent. Suitable for selected exposures
Stainless steel Common grades include corrosion-resistant austenitic stainless steels; exact grade affects performance. Check chloride exposure, chemical compatibility, galvanic interaction, strength, and approved load data. Stainless steel can improve corrosion resistance but may have different strength and installation characteristics. Preferred for corrosive exposure when approved
Outdoor, marine, or chemical exposure Moisture, salt, de-icing chemicals, acids, and alkalis can accelerate corrosion. Specify a corrosion-resistant material or coating supported by the applicable environmental data. Corrosion reduces cross-sectional area and can compromise the expansion mechanism or threads. Perform exposure assessment
5. Safety Standards and Installation Controls
Product evaluation Look for documented testing or evaluation for concrete anchoring, such as an applicable post-installed-anchor assessment based on AC193 or an equivalent recognized method. Confirm that the evaluation covers the anchor diameter, embedment, cracked or uncracked concrete, and loading condition required for the project. Evaluation data establishes the limits under which published capacities may be used. Required for safety-critical work
Design standard Projects may use ACI 318, EN 1992-4, or another locally adopted structural design standard. Use the code required by the project jurisdiction and design professional. Different standards use different resistance factors, load combinations, and failure-mode checks. Follow the governing code
Hole cleaning Remove drilling dust using the cleaning sequence specified for the anchor system. Use the stated brush, blow, vacuum, or other cleaning method and inspect the hole depth. Dust can interfere with expansion and reduce reliable contact between the anchor and concrete. Mandatory installation step
Installation torque Use a calibrated torque wrench and apply the specified torque after the anchor is fully seated. Never replace the specified torque with a visual estimate or impact-tool setting alone. Under-torque may prevent proper expansion; over-torque can damage threads, concrete, or the anchor. Control and document torque
Inspection and testing Visual inspection, torque verification, proof loading, or pull testing may be required depending on project risk. Follow the project specification and the anchor evaluation requirements. Inspection confirms that installation conditions match the design assumptions. Risk-based requirement
6. Long-Term Performance Checklist
Service temperature Anchor strength and coating performance are temperature-dependent. Check the published temperature range, especially near furnaces, equipment, roofs, or refrigerated spaces. Extreme temperatures can affect steel strength, corrosion rates, and surrounding concrete. Verify project conditions
Cracked concrete Concrete may crack during service because of shrinkage, movement, or structural loading. Use an anchor evaluated for cracked concrete when cracking is possible or required by code. Cracks can reduce anchorage resistance and increase sensitivity to edge distance. Specify cracked-concrete approval when applicable
Maintenance exposure Anchors may be exposed to water, cleaning agents, vibration, impact, or repeated inspection. Include periodic visual checks for corrosion, nut movement, cracking, and fixture deformation. Early detection can prevent loss of capacity or secondary damage. Include in maintenance planning
Documentation Keep the anchor specification, evaluation data, installation date, batch information, torque records, and inspection results. Ensure records identify the installed size, material, embedment, location, and installer. Traceable records support quality control, future inspection, and replacement decisions. Document critical installations
Important: The values and ranges shown are general selection guidance, not universal load ratings. Final anchor selection must be based on the actual concrete or masonry condition, design loads, anchor evaluation data, governing code, installation instructions, and project-specific engineering requirements.

Article Source:

Smart Robotics brand movie

Watch video